|

Battles
Home Page
Gdansk
Rebellion 1576 to 1577
|
|
Swedish Polish War 1600 to 1609
Military Operations, 1605
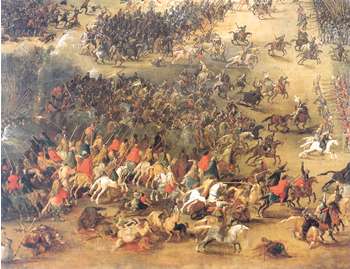
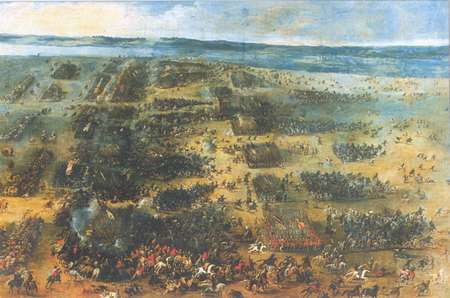
THE BATTLE OF KIRCHOLM
The Swedish council of war on 26th
decided to move with all their forces to Kircholm in order to surprise
the Poles in the night. They left only a few hundred soldiers to
guard the camp. At about 22:00 the Swedes 10,700 strong - 8,200
infantry 2,500 cavalry and 11 canon - left their camp but marched
during a down pour. The watch alerted the Polish-Lithuanian camp
and because of this the Swedes waited for sunrise (approx 5:30)
on 27th before forming up on the heights above the village Kircholm.
They stood facing the Polish-Lithuanian army which was on the opposing
heights across a dried river bed which was marshy only at its northern
edge. The Swedes formed themselves in four lines in a checkerboard
pattern alternately cavalry and infantry. The latter were positioned
in 13 small tercios - squares of some few hundred men (7 in the
first and 6 in the third lines) while the cavalry formed the second
(6 squadrons) and the fourth (5 squadrons) lines.
 The
Swedes began to dig in, they positioned their infantry opposite
the enemy and the cavalry behind ready to move onto the wings or
between the gaps in the infantry. So that they could attack the
Polish-Lithuanian cavalry once it had lost its impetus in battle
with the infantry. Due to the great depth of formation the rear
lines moving to the wings would parry any outflanking maneuvers. The
Swedes began to dig in, they positioned their infantry opposite
the enemy and the cavalry behind ready to move onto the wings or
between the gaps in the infantry. So that they could attack the
Polish-Lithuanian cavalry once it had lost its impetus in battle
with the infantry. Due to the great depth of formation the rear
lines moving to the wings would parry any outflanking maneuvers.
Neither side wanted to loose its advantageous position
on the higher ground above the valley and both waited for the enemy
to attack. Wanting to provoke the Swedes to attack Chodkiewicz positioned
his forces in a few lines to try and give the impression that his
forces were even smaller than in reality. This did not however have
the desired effect as Charles did indeed dread moving down into
the path of the hussar lances.
 Finally
in the afternoon Hetman ordered his screening arquebusiers to withdraw
suddenly and obviously, in an attempt to give the impression it
was the start of the retreat of the whole army. Charles on seeing
this and fearing this movement of his weaker enemy as a real retreat
ordered his forces to attack. Giving up his caution he resigned
from his intended defend-attack tactic and moved his cavalry to
the wings, so as to provide for more options in attack. Most of
the cavalry he moved to his left wing wanting to push the enemy
against the river Dzwina. As the Swedes made their initial maneuvers
Chodkiewicz, concerned with his army's morale, ordered a group of
camp followers, whom had previously sent North, to reveal themselves.
They moved south towards this main forces in a cloud of dust and
with much noise to give the impression of arriving reinforcements
from Krzysztof Radziwill. Finally
in the afternoon Hetman ordered his screening arquebusiers to withdraw
suddenly and obviously, in an attempt to give the impression it
was the start of the retreat of the whole army. Charles on seeing
this and fearing this movement of his weaker enemy as a real retreat
ordered his forces to attack. Giving up his caution he resigned
from his intended defend-attack tactic and moved his cavalry to
the wings, so as to provide for more options in attack. Most of
the cavalry he moved to his left wing wanting to push the enemy
against the river Dzwina. As the Swedes made their initial maneuvers
Chodkiewicz, concerned with his army's morale, ordered a group of
camp followers, whom had previously sent North, to reveal themselves.
They moved south towards this main forces in a cloud of dust and
with much noise to give the impression of arriving reinforcements
from Krzysztof Radziwill.
Until now the Poles and Lithuanians had stood in
a column and now they deployed into battle order. Chodkiewicz had
3,700 to 4,000 men of which 2,700-3,000 cavalry and around 1,000
infantry. This was prior to the arrival of 300 reiters in the service
of Prince Frederick Kettler of Courland - who arrived crossing the
river and taking up positions behind the Polish-Lithuanian centre.
Though the Hetman had significantly weaker forces he managed to
achieve a numerical superiority on his;
- Left wing led by Tomasz (Thomas) Dabrowa comprised
1,200 to 1,300 cavalry - 100-400 hussars, 200 reiters, 700-900
cossack cavalry and the Tartars in the camp - in 4 lines. The
edge of the left wing was shielded by the fortified camp position
on the heights of the Dwina river bank and held by 2 cannon and
4 banners of Tartars (350). Mansfeld had 1,000 reiters to oppose
them.
- The Polish centre under Wincent (Vincent) Wojna
stood in two lines and comprised 1,000 infantry with 5 cannon,
300 hussars and 300 Courlandian reiters against 8,200 Swedes with
11 cannon under Lennartsson.
- On the right wing in 4 lines stood 700 cavalry
almost solely hussars, though including 100 Cossacks of Jan Piotr
Sapieha, against 1,500 retiers led by Henri Brandt.
- The main reserve under Teodor (Theodore) Lacki
numbered 200-400 hussars.
 Chodkiewicz
aimed at an outflanking on the left wing so as to force the Swedes
away from the river rather than pushing them against it. This was
the preferred option in order to allow the Polish-Lithuanian horsemen
to take advantage of the drier ground and maximise use of their
best qualities - the impetus - of full gallop charges. The wet meadows
of the old riverbed to the north did not provide the opportunity
of launching a forceful outflanking on that wing, limiting the fighting
to a relatively confined area. Further more the wet meadows did
not pose for the Swedish cavalry the same problems as they did not
use the full gallop charge. Chodkiewicz
aimed at an outflanking on the left wing so as to force the Swedes
away from the river rather than pushing them against it. This was
the preferred option in order to allow the Polish-Lithuanian horsemen
to take advantage of the drier ground and maximise use of their
best qualities - the impetus - of full gallop charges. The wet meadows
of the old riverbed to the north did not provide the opportunity
of launching a forceful outflanking on that wing, limiting the fighting
to a relatively confined area. Further more the wet meadows did
not pose for the Swedish cavalry the same problems as they did not
use the full gallop charge.
However the right Polish-Lithuanian wing was fairly
strong, proportionately stronger than the 'tying-in' wing at Kokenhausen
in 1601. Therefore it was certainly intended to be an active wing.
Not having superiority in impetus or numbers they had some advantage
due to their shallower line allowing the use of more lances.  While
the right wing and center were primarily formed of heavy cavalry
(hussars and reiters) best for breaking through enemy formations
in frontal attacks, so the left wing was primarily Cossack cavalry,
so superb at maneuvers on enemy flanks. While
the right wing and center were primarily formed of heavy cavalry
(hussars and reiters) best for breaking through enemy formations
in frontal attacks, so the left wing was primarily Cossack cavalry,
so superb at maneuvers on enemy flanks.
When the Swedish infantry reached the base of the
valley and began to climb the opposite slope, the Polish-Lithuanian
artillery opened fire and as the Swedes drew nearer so did the infantry.
Next from between the gaps moved the hussars followed by the Courlandian
reiters, attacking in full gallop charges leading to vicious fighting
with the Swedish infantry.
 The
retreat of the arquebusiers had lured the Swedish right wing into
the fire of the Polish-Lithuanian Camp. The distracted cavalry was
then attacked frontally by Dabrowa's main forces and at the same
time outflanked by the Tartars and were quickly broken. Cavalry
struck the rear and side of the Swedish right wing tercio who were
busy in battle with the Polish-Lithuanian centre. The
retreat of the arquebusiers had lured the Swedish right wing into
the fire of the Polish-Lithuanian Camp. The distracted cavalry was
then attacked frontally by Dabrowa's main forces and at the same
time outflanked by the Tartars and were quickly broken. Cavalry
struck the rear and side of the Swedish right wing tercio who were
busy in battle with the Polish-Lithuanian centre.
The fighting on Sapieha's wing lasted longer. Brandt's
reiters moved somewhat later than the rest of the Swedish forces.
 Sapieha
waited, while the wet meadows were passed, where his hussars would
have lost impetus. When the Swedish cavalry moved onto firmer ground,
Sapieha attacked with his first line smashing the enemy and pushed
them onto the wetlands, however the Swedish second line repulsed
the hussars, who had not managed to reform after the chase. When
the Swedes reached the dry ground they were struck by Sapieha's
second line, who then also repulsed Brandt's reorganised first line.
Chodkiewicz seeing the success of Dabrowa and the tying up of the
Swedish centre, and since the Swedes had also engaged all their
forces, decided to use his reserve to outflank them on Sapieha's
wing. Lacki struck the side of Brandt's reiters and crushed them
completely. Sapieha
waited, while the wet meadows were passed, where his hussars would
have lost impetus. When the Swedish cavalry moved onto firmer ground,
Sapieha attacked with his first line smashing the enemy and pushed
them onto the wetlands, however the Swedish second line repulsed
the hussars, who had not managed to reform after the chase. When
the Swedes reached the dry ground they were struck by Sapieha's
second line, who then also repulsed Brandt's reorganised first line.
Chodkiewicz seeing the success of Dabrowa and the tying up of the
Swedish centre, and since the Swedes had also engaged all their
forces, decided to use his reserve to outflank them on Sapieha's
wing. Lacki struck the side of Brandt's reiters and crushed them
completely.
 The
routing Swedes fell into the left wing of their own infantry who
were already retreating and further disordered them. When Lennartsson
(centre's commander) was killed part of the retreating tercios collapsed.
At least half of the infantry became surrounded by the Polish-Lithuanian
cavalry and the rest met defeat in the pursuit, which continued
almost to Riga. The
routing Swedes fell into the left wing of their own infantry who
were already retreating and further disordered them. When Lennartsson
(centre's commander) was killed part of the retreating tercios collapsed.
At least half of the infantry became surrounded by the Polish-Lithuanian
cavalry and the rest met defeat in the pursuit, which continued
almost to Riga.
The Swedish losses were around 6,000, of which only
a few hundred were prisoners. Particularly heavy losses were suffered
by the infantry, well over half their original strength. The Poles
and Lithuanians lost some 100 dead and a few hundred injured, mostly
in battle with the infantry. The remainder of the Swedish infantry
escaped onto ships at Dynemunt, while reiters led by Mansfeld retreated
to Parnawy. The unpaid Polish-Lithuanian army revolted and Chodkiewicz
was unable to take further advantage of this superb victory.
 8
8 
|
|
Page 8
Link
to MainMap
Link
to Battle Map
|
